Tag Archive: thyme


Mussels 4 Ways

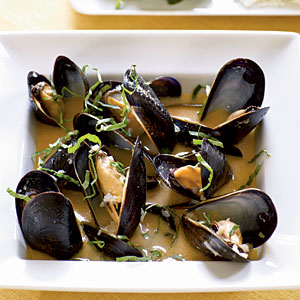
musselsAhh, mussels. It’s hard to describe precisely why I like these crusty, salty bivalves. Once in a while I get a little piece of shell as I’m eating, and I think to myself: why do I do this? Simply speaking: mussels are delicious. Labor-intensive, yes. Delicate and high maintenance, a little. Dirty and fishy, often enough. So what’s the big deal? Again, mussels are delicious – and good for you to boot. Plus, making mussels (avec le bouillon) is an art form that I have a lot of respect for – the art of broth-making.

There’s something salivating about a big pot of mussels on the table, filled with dark shells submerged in a broth that smells something of butter and wine. Furthermore, mussels are one of those magical foods that become heavenly when cooked with/in alcohol. The catch? You have to take care when making them, or at least pay some attention. I used to buy the poor creatures alive, keep them padded with damp paper towels in my fridge for 24 hours while I got my act together to go ahead and steam them for dinner. A quarter of the little guys would die as I was trying to de-beard them between the sink and the hot stove. I’ll agree, that’s way to much work… My solution? The seafood section at the grocery store is huge, have you checked it out? There’s all sorts of stuff there, including — mussels, in the shell, beautiful and ready to go. I buy a huge, flash-frozen batch for around $9.00 and keep it in the freezer until I’m ready. The best part? No defrosting, you get to concentrate on the broth and as soon as that’s ready you crank up the heat, add frozen mussels, and five minutes later (less, really) you’re ready to dig in.

strained-mussels-judy-mercer

Mussels seem like a poor man’s food but when you’re eating the poached and pinkened sea creatures between pieces of a baguette and some roasted garlic, it’s close to heaven 😉 My advice is to make mussels in any form — and experiment a little with your favorite seafood spices and sauces. Get the mussels frozen and save them in your freezer for a rainy day. I’ve been playing around with mussel recipes and these particular 4 I made up from looking over the various versions in existence (and my own taste and favorite ingredients). Belonions1ow are what I think are the best ways to serve these sweet & salty little things. As always, when making a big pot of mussels, remember to serve them in bowls with big spoons; and other than the mussels + steaming broth, all you really need is a lot of bread and, oh yeah, napkins.

My star ingredient? The onion family. In every one of these mussel recipes, one of the onion family is used; and thank god it’s a big family. Cooking the onions/garlic is how this dish begins and the finished product would not taste the same without this aromatic group of ingredients. The super hero ingredient? Vegetable bullion allows you to make broth with some hot water in seconds, and it can sit in your spice drawer until needed for months. Just be aware it packs a salty taste. But broth is what makes mussels such a sensational dish, so be sure NOT to water down the both any more than is needed, or maybe just water it down with wine instead 😀

Mussels – 4 Ways (!)

(1) American – Beer Mussels with Bacon, Red Beans, Roasted Garlic, & Fresh Thyme

2 lbs. frozen musselsbeer_mussels

Broth: 1 bottle (light) beer, 5 pieces of bacon, 5 shallots (sliced), 3 Tbs. butter, 3 cups vegetable broth, 1 can kidney beans (drained & rinsed),

Season with: fresh Thyme (minced)

Serve with: whole wheat baguette (sliced), 4 heads of garlic (roasted), & aged Parmesan (shredded)

(1) To roast garlic: preheat the oven to 190 degrees Celsius (375 Fahrenheit). Cut the top off 4 heads of garlic with a serrated knife. Season lightly with oil, salt, & pepper and wrap OLYMPUS DIGITAL CAMERAtightly in foil. Bake for 60-65 minutes until cloves are golden and sweet. Let cool and remove from foil before serving. (2) Melt butter in a large pot over medium-high heat. When hot, add shallots and cook about 3-4 minutes, stirring occasionally. (3) Add bacon sliced and cook until fat had rendered and the pieces have browned slightly, 4-5 minutes more. Remove bacon from pot and chop (or chop in the pot with a pair of scissors). (4) Return bacon to the pot. Add broth, beans, and a Tablespoon of fresh Thyme. Bring the mixture to a boil and then lower the heat; simmer, covered until reduced by 1/3, 10-15 minutes. (5) Return heat to high and add frozen mussels and beer. Cook covered, stirring occasionally until mussels are pink and fragrant, 5 -6 minutes. (6) Season the broth to taste with salt, pepper, and fresh Thyme. Serve immediately in bowls accompanied by bread, roasted garlic, & cheese.

Serves 4

(2) Asian – Spicy Mussels with Saki, Thai Chilies, Mushrooms, & Sesame Seeds

2 lbs. frozen musselsmussels_asian

Broth: 1 cup saki, 1 bunch green onions (sliced), 3 Tbs. butter, 2 cups mushrooms (sliced), 1 small can bamboo shoots (drained & rinsed), 1 small can water chestnuts (drained, rinsed, & sliced), 3 cups vegetable broth, 2 Thai chilies (sliced), 1 piece fresh ginger (peeled & sliced), 1/2 Tbs. soy sauce.

Season with: sesame seeds (toasted) & chili flakes

Serve with: garlic bread or steamed rice

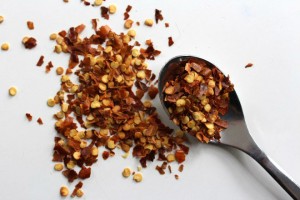
(1) Melt butter in a large pot over medium-high heat. When hot, add green onions and cook about 3-4 minutes, stirring occasionally. (2) Add mushrooms and 1/2 Tbs. sesame seeds, stirring occasionally until slightly browned.  (3) Add ginger, bamboo shoots, chili-flakesand Thai chilies, stirring often until fragrant, another 5-6 minutes. (4) Add the broth, soy sauce, and water chestnuts. Bring the mixture to a boil and then lower the heat; simmer, covered until reduced by 1/3, 10-15 minutes. (5) Return heat to high and add frozen mussels and saki. Cook covered, stirring occasionally until mussels are pink and fragrant, 5 -6 minutes. (6) Season the broth to taste with salt, chili flakes, and sesame seeds. Serve immediately in bowls accompanied by rice and/or bread.
Serves 4

(3) French – Provencal Mussels with White Wine, White Beans, Dill, & Fresh Tomatoes

2 lbs. frozen musselsMUSSELS-PROVENCAL

Broth: 1 cup white wine, 2 red onions (sliced), 3 Tbs. butter, 2 tomatoes (chopped), 1 can white beans (drained & rinsed), 1 celery stalk (sliced), 3 cups vegetable broth, 1 can artichoke hearts (drained, rinsed & chopped), 1 Tbs. dried Dill, 2 garlic cloves (sliced).

Season with: sea salt, cracked pepper, & lemon juice

Serve with: buttered bread & dollops of Greek yogurtwhite_beans

(1) Melt butter in a large pot over medium-high heat. When hot, add red onions, celery, and garlic. Cook about 3-4 minutes until softened, stirring occasionally. (2)  Add tomato, dried dill, and artichoke hearts, stirring often until fragrant, another 5 minutes. (4) Add the broth, and white beans. Bring the mixture to a boil and then lower the heat; simmer, covered until reduced by 1/3, 10-15 minutes. (5) Return heat to high and add frozen mussels and white wine. Cook covered, stirring occasionally until mussels are pink and fragrant, 5 -6 minutes. (6) Season the broth to taste with salt, pepper, and lemon juice. Serve immediately accompanied with buttered bread & dollops of Greek yogurt 🙂

Serves 4

(4) Indian – Curry Mussels with Chickpeas, Red Wine, Leeks, & Cashews

2 lbs. frozen musselsCurry-Mussels

Broth: 1 cup red wine (sub Indian beer), 1 bunch leeks (washed & sliced), 3 Tbs. butter, 2 celery stalks (chopped), 2 carrots (peeled & chopped), 3 Tbs. curry powder (any), 1 can chickpeas (drained & rinsed), 3 cups vegetable broth, 1/2 cup cashews (salted), 1/2 cup milk (or cream), 3 garlic cloves (sliced).

Season with: roasted paprika & fresh cilantro (minced)

Serve with: garlic naan & seared veggies

(1) Melt butter in a large pot over medium-high heat. When hot, add leeks, celery, carrot, OLYMPUS DIGITAL CAMERAand garlic. Cook about 10-12 minutes until softened, stirring occasionally. (2)  Add cashews, curry powder, and chickpeas, stirring often until fragrant, another 5 minutes. (4) Add the broth and bring the mixture to a boil and then lower the heat; simmer, covered until reduced by 1/3, 10-15 minutes. (5) Return heat to high and add frozen mussels and red wine. Cook covered, stirring occasionally until mussels are pink and fragrant, 5 -6 minutes. (6) Season the broth to taste with milk (adding more if needed), salt, roasted paprika, and fresh cilantro. Serve immediately accompanied with buttered naan or seared veggies of your choice.

Serves 4
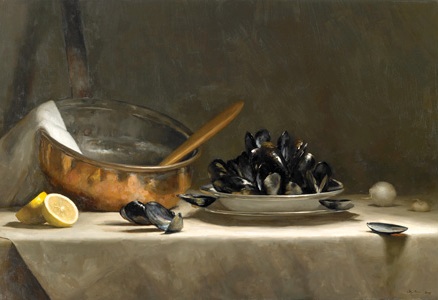
painting_musselMy “trick,” if you will, is that I only add the wine/saki/beer to the pot of broth when I throw the mussels in, that way the little critters basically poach in alcohol, versus it just burning off in all the boiling… Steaming hot and wreaking of herbs and butter, it’s hard not to get a little messy devouring dishes like these 😛

My question: what is your all-time favorite seafood dish to eat ? – something you wouldn’t make for yourself, but might treat yourself to? Mine would still have to be lobster tail, mmm… 🙂

9.4.13

Honey-Lacquered Duck

Ahhh, honey. Is there a spoonful of anything nicer? I don’t why I don’t use it more. They need to start selling honey in Ziploc-style packs you can cut the corner of and just squeeze; it’s silly trying to scrape it out of jars when all honey does is collect and coat everything it comes into duckcontact with sweetness. Really food marketers, simplify things when it comes to honey, seriously because what even is honey?! Oh yeah, bee drool…delicious, amazing bee drool (!) The earth is strangely tasty 🙂

Oh yes and thank you (Cucina La Italiana) for using the awesome adjective “honey-lacquered” as I think it truly fits in the case of this recipe. I have always wanted (an excuse) to make duck and have never gotten the chance to roast a whole one of these bad boys in the oven. While on ferie (vacation) in Jylland, I decided to make this for a family get-together. Looking back on it, everything was perfect except for perhaps the fact that I really should have roasted 2 ducks 😀 Oh well, at least I’ll know for next time…

Roasting a whole bird is intense (sorry, I mean intensive) but it’s much easier with help (as in more than 1 person…) I put the duck atop a bed of halved shallots and baby potatoes (again, should have bought wayyyy more of those). For those of you imagining the ridiculousness of trying to get goopy honey off a goopy spoon onto a roasting bird, mix the honey with some water in a mug and microwave it for 15-20 seconds and viola, honey-syrup, perfect for basting! 🙂

honeyhoneyThe star ingredient in this recipe, I imagine it’s pretty easy to tell: honey. It might have been obvious, but honey really is key in amping up the flavor aspect of just about any dish. My future mother-in-law (it sounds so official!) said her biggest complaint with duck when she’s had it before is that it’s always been dry (and chewy:( ), but not this duck! Thank you honey, really, I don’t know why MORE things (especially meat..) aren’t ‘lacquered’ in honey, I mean bee drool 😛

Roast Honey-Lacquered Duck with Shallots & Potatoes

Ingredientsshallot_potato

1 whole duck (3-4 kg/5-7 lbs). defrosted, giblets removed

1 1/4 cups honey (3 dl)

10 shallots, peeled & halved

1/2 kg (≈1 lb) baby potatoes, halved

fresh Thyme sprigs, coarsely chopped

sea salt & cracked pepper

(1) 1-2 days before roasting; defrost the duck, making sure giblets are removed (you can roast the neck too, if desired). Make sure the skin is clean of stray feathers; if not, pluck with kitchen tweezers. Rinse and dry the duck and set on a plate, breast-side up. Rub all over the outside with 1/4 cup sea salt and let chill, uncovered in fridge overnight or up to 2 days. (2) Preheat the oven to 220 degrees Celsius (450 degrees Fahrenheit). Bring a large pot of water to boil on the stove with 1/2 cup (≈1 dl) of honey stirred in. Rinse sea salt off the duck. When the water is rapidly boiling, put the duck into the pot (timing precisely) and let boil no more than 5 minutes. (3) After 5 minutes, drain the duck and score the skin every 2 cm or so with a paring knife. In a large roasting pan, put the halved shallots and baby potatoes, seasoning lightly with salt and pepper. Place the duck on top of vegetables, breast-side up. Tie legs together with kitchen twin (optional). (4) When the oven is preheated, put the duck on the middle rack and let roast 30 minutes. Then turn the oven down to 160 degrees Celsius (325 degrees Fahrenheit) and let roast for another 1 hour and 45 minutes, basting when necessary. (5) Transfer duck to a cutting board, cover, and let rest 15 minutes, brushing with 2-3 spoonfuls of honey every 5 minutes. Keep the potatoes and shallots in the oven to stay warm. (6) When ready to serve, transfer roasted shallots and potatoes to a large serving dish and season with salt, pepper, and thyme sprigs. Carve the duck (removing the legs first, halving the breasts) and arrange pieces atop or aside the roasted veggies for serving 🙂 Garnish with Thyme sprigs. Goes well with bread and/or a light salad.

guineafowlServes 6

So, I AM going to roast a whole duck again, and soon! No excuses, and now no hesitation as the whole process will be sweetly familiar to me 🙂 My next big(/semi-ridiculous) idea? Roasting a whole bird on a grill…yeah, now that sounds like Summer!

My question: What is your favorite bird (poultry) to roast in the oven?

Ruling out roast chicken which a classic favorite of mine and turkey (god bless THAT bird, but it’s so big!) I’d have to say guinea fowl is my favorite because they are just cute (I mean leaner), little, and juicy – plus you don’t have to feel bad about eating a whole one all by yourself.. 😛

6.7.13

Menu for a Spring Celebration

Last Sunday, I had the pleasure of throwing a baby shower at our little apartment. This post comprises the menu. Everyone brought plenty of soda and juice, and one of my friends even made some delicious Spanish food, which disappeared mighty quick. It was a beautiful day, with wonderful company, good food (if I might say so myself), and turned out to be one lively celebration. I thought it only best to share some of the delectable deliciousness that accompanied everything 🙂

The menu is organized in basically the order in which it was served, with the first course or starter being homemade jam (I mean, marmalade), then the main course, ending with a very simple dessert. I first read this jam recipe in Bon Appetit but after glancing at the picture (bleh..) I decided to make my own version and ended up winging it with the rest of the recipe. My other friend, a very talented individual in ways of baking, was nice enough to make fresh rolls with raisins for the shower and her boyfriend brought along a tasty loaf of bread so the jam ended up being a good way to start off everything. I served both the bread and the jam alongside a soft cheese (something crème), but butter would work just as well..

The antipasti dish I also found in Bon Appetit, accompanied by much better picture this time so I added a couple of things I thought it needed to make the main course dish. Namely, I served the salad with a strip of peppered ham, more slices of mozzarella, baby tomatoes (because it’s a baby shower:-) and plenty of garlic in the raw form, because the store-bought pesto just wasn’t cutting it. Olives I marinated in a spicy-salty brine from the week before I added to the plates as a finishing touch, which turned out to be some of the more flavorful aspects of the meal. It is by request(s) that I include the olive recipe below because frankly, it’s easy to make and the olives turn out so much tastier than they’d normally be just sitting in your fridge. I really hope someone makes their own version of these marinated olives and let me know how it tastes!

The dessert proved to be the simplest dish to prepare out of this menu, which is always good at the end of any event and it included the essentials — fruit, nuts, cheese (yes, again) and honey. I got the idea from last April’s Cooking Network magazine but the nuts were a welcome inspiration on my part. I think the key thing here is to get quality fresh fruit, because pears can be pretty disappointing if unripe. Blue cheese may be a reluctant choice to some but say just yes to the moldy dairy because everything is delicious when sprinkled with honey 😀

The star ingredient in this menu is: cheese! I included cheese in every course (because I can, and so I will) and all different kinds of it too, mild and fluffy with the main course (god bless the mozzarella), light and creamy with the starter, and mottled with flavor for the dessert. Remember, cheese is pure protein (okay, and a little fat) but I maintain the believe it more flavor than calories, so no restraint should be necessary 😉 The Danes love cheese just as much as I do so I didn’t really need an excuse. By the end of the day, we were all so full I feel I may have overdone it just a little. Oh well!

Fig-Thyme Jam

Ingredients

1/2 kilo ( or just over 1 lb.) dried figs

1/2 cup of sugar

1 bunch of fresh Thyme

1 lemon

3 Tbs. honey

(1) Boil a kettle of water. In a bowl, place the dried figs and cover with the boiling hot water. Let soften 10 minutes, then drain, stem, and coarsely chop all of the figs. (2) In a medium saucepan, put the figs and sugar, adding enough water to just cover all contents in the pot. Make sure the thyme is washed thoroughly and secured in a bunch with string then put into the saucepan as everything heats up. Bring the mixture to a boil over medium-high heat. (3) Meanwhile, zest and juice the lemon and set aside. When the jam mixture is bubbling, lower the heat to medium. (4) Stirring often, cook until all of the liquid evaporates and jam starts to stick to the bottom of the saucepan, 20-30 minutes. (5) Mix in the lemon zest and juice and cook everything a minute more. Remove from heat, discard the thyme bunch, and let the jam cool. (6) Stir in the honey and remove any visible thyme stems (but not the little leaves:-) Chill jam in the fridge 1 hour before serving (keeps chilled up to 3 weeks). Serve with bread or toast and butter or a mild cheese.

Serves 6

Citrus, Coriander, and Chili Marinated Olives

Ingredients

2 cups mixed olives (like green, black, or kalamata)

1 lemon, seeded & sliced

1/2 cup of olive oil

4 garlic cloves, thinly sliced

2 fresh Thai chiles, halved (or 4 dried)

1 Tbs. crushed Coriander seeds

1 tsp. crushed fennel seeds

1 tsp. crushed black peppercorns

1 Tbs. sherry vinegar

3 bay leaves

sea salt

(1) In a medium tight-sealing container, mix the olives and lemon pieces. (2) In a saucepan, bring the olive oil, sliced garlic, chilies, and all of the spices slowly up to a simmer over low heat. Let bubble until fragrant and the garlic begins to brown, 20-30 minutes. (3) Remove the pan from heat and add vinegar. Cover and let the brine steep for 1 hour. (4) When cool, pour the oil mixture over the olives and mix well, letting everything marinate at room temperature for up to 2 hours (can be stored in the fridge for 2-3 weeks). Serve the olives at room temperature.

Serves 6

Pesto Antipasti with blanched Beans, Baby Tomatoes, and fresh Mozzarella

Ingredients

1/4 kilo fresh green beans (0r 1/2 lb)

1/4 kilo fresh flat beans (or wax beans)

1 bunch baby tomatoes, stemmed & halved

1 can white beans, drained

1 bunch green onions, coarsely chopped

4 garlic cloves, minced

1 lemon, juiced

1/4 cup store-bought (or homemade) basil pesto

300 g fresh buffalo mozzarella (or just over 10 oz), thickly sliced

1 cup mixed olives (from the marinated olive recipe above)

1 packet thinly sliced meat, for serving (like ham or prosciutto)

2 Tbs. olive oil

salt & cracked pepper

(1) Top and tail all of the fresh beans, cutting into 2-cm pieces. Bring a large pot of salted water to a boil over high heat. Once at a rolling boil, throw in all of the fresh beans and blanch for about 1 minute until bright green. Drain the beans and immediately rinse with ice cold water. (2) In a large mixing bowl, combine the white beans, baby tomatoes, green onions, minced garlic, and all of freshly blanched beans. Add pesto, 2 Tablespoons of olive oil, and lemon juice, mixing well. Season the salad to taste with salt & pepper (or more minced garlic:-) (3) When ready to serve, arrange 3 slices of the fresh mozzarella, 1 piece of meat, and a generous cup of the salad on each small plate. Add 3 or 4 marinated olives on the side.

Serves 6

Pear Slices with Blue Cheese, Walnuts, & Honey

Ingredients

3 ripe yellow pears, cored & sliced

1 wedge of soft blue cheese

1/2 cup of walnuts, shelled

3-5 Tbs. honey

On small dessert plates, arrange 3-4 pear slices alongside 3 walnuts. Spread a thin (but not too thin:P) layer of blue cheese over the pear slices and drizzle the plates with honey. Serve immediately.

Serves 6

Well, that was my baby shower menu. I’m so happy everyone came, had a good time, and left with full bellies. I enjoyed everything about that day and have so many baby things now, I dare say the little guy is taking over my closet 😉 Hopefully one day he’ll like cheese as much as I do!

My question: What is the best cheese to serve as or with dessert? I’d love some new ideas..

3.3.2012

Spicy Chocolately Chili

Finally, Winter is here! (Never thought I’d be excited about that 😉 and now that it’s oh so cold outside, I have renewed interest as well as every reason to be cooking rich, hearty meals that can simmer on the stove (ahem, hotplate) until tender and flavorful enough. I decided to make chili because for one, it is obvious I am missing American food and second, this mouth-watering recipe contains all of nourishingly good stuff I like, fat and sugar, veggies and salt, protein and carbs (and just enough…) But I must emphasize here, this is no ordinary chili.

I got this recipe from Food & Wine and while I’m wondering what this ‘Texas-style’ phrasing is indicative of, there is no doubt that this chili is blissfully tasty. With spicy flavors like chili powder and canned chipotles, herbaceous flavors like fresh Thyme and crushed Coriander, sugary flavors like coffee and dark chocolate, and other wonderfully wholesome ingredients like beef and beer (see what I’m saying?!!) I highly–emphatically, joyfully, exuberantly–recommend making this recipe for yourself, and you will see, I mean smell & taste, what I mean!

The image I include in this post is a rather poor visual representation of the final product because in actuality, the chili was this very deep, dark color, probably owing a lot to the coffee and chocolate, and the sauce very thickened, a process that is perfected by allowing this to cook (or simmer…) for the allotted amount of time needed on the stove. Patience here is the key, but in the process of this ‘stewing’, the kitchen (or very small apartment) will be filled with the delicious aromas of spicy goodness 🙂

The star ingredient in this recipe would have to be the dark chocolate–not that the chipotles, thyme, or beer were lacking in any respect–but simply because it gives the chili this rich (and yes, chocolately) flavor that was interesting, undeniable, and worked in delicious conjunction with the other savory aspects of this meal. When served, zesty fresh flavors of minced red onion and melted cheddar cheese on top combine in an exceptional feast 🙂 Just writing this post has made me want to cook this chili all over again, mmm….

Texas-Style Beef Short Rib Chili with Chocolate, Coriander, and Chipotles

Ingredients

2 lbs. beef short ribs

3 medium red onions

2 Anaheim or Pasilla chile peppers

2 Poblano chile peppers

1 red bell pepper

3 canned chipotle chiles in adobo sauce

5 garlic cloves, minced

1 bunch fresh thyme

1 can white beans, drained

1/2 lb. cremini mushrooms, thinly sliced

4 cups chicken broth

1 bottle of pilsner beer (your choice:-)

3 Tbs. ground Coriander

2 Tbs. ground Cumin seeds

2 Tbs. Ancho Chili powder

1 bar of dark chocolate, broken into pieces

1 1/2 cups fresh-brewed coffee

flour

olive oil

salt & cracked pepper

pita bread/tortillas, for serving

shredded cheddar cheese, for serving

(1) Heat a skillet or frying pan over a medium-high temperature on the stove. Add fresh peppers and roast, uncovered, turning occasionally until skins are charred, 6 to 8 minutes. Put peppers in a bowl and cover with boiling water, letting sit 20 minutes or so until softened. (2) Meanwhile, chop 2 of the red onions coarsely for the chili and finely chop the remaining onion for serving. Cover the minced onion to be used for garnishing in a small dish and refrigerate until ready to serve. Separate fresh thyme leaves from their stems and put coarsely chopped onions, minced garlic, sliced mushrooms, and fresh thyme all in one large bowl; set aside. (3) Drain the peppers, de-stem, and seed them. Add roasted peppers, chipotle peppers with adobo sauce, and fresh-brewed coffee to a blender, pulsing until smooth (or if you don’t have a blender like me, just mince the peppers in a mug with scissors, before mixing the three together in a bowl). (4) Trim any large strips of fat from short ribs and cut into 1/2-inch or small 1-inch cubes. Season meat generously all over with salt and pepper. Heat 2 Tbs. of olive oil in a large pot over medium-high heat. (5) When the pot is hot, add short rib cubes and cook, stirring to prevent sticking, until pieces are browned all over, about 8 to 10 minutes. (6) Lower heat to medium and all of add the onion-mushroom mixture, stirring often, and cooking until veggies are slightly softened, another 4 minutes. Add the Coriander, Cumin, and Chili powder, mixing well until fragrant, another 2 minutes. (7) Next, stir in the blended peppers and coffee, chicken broth, white beans, and bottle of beer. Lower the heat, partially cover, and let chili simmer until meat is tender and the sauce is reduced, about 2 hours. (8) Ladle 2 cups of sauce into a bowl and stir in 2 Tbs. of flour with a fork, whisking until well blended; return sauce to the pot and cook until chili has thickened, another 10 minutes. Mix in the dark chocolate pieces until melted and remove from heat. (9) Dish up chili in bowls with warm or toasted pita bread on the side. Sprinkle finely chopped red onion and grated cheddar cheese across top of chili and serve.

Serves 4

So that comprises my experimenting in the art of slow cooking flavorful food. I will be returning home to the snowy mountains of Colorado this weekend and shall once again have access to a fully-functioning kitchen (and the wonderful guidance of my mother, the culinary expert) so who knows what wonderfulness is in store for me and my ever-expanding belly 🙂

My question: what is the best (and reasonably priced) cut of meat to slow cook in chili and/or stews?

12.9.12

Thanksgiving in a Danish Kitchen

So, I’m thinking ‘Danish’ can be closely compared to ‘European’ but I’d rather not generalize in this case, the fact of the matter is that I am most definitely in Europe, where stuffing mix is hard to come by and nobody tends to remember this food-loving American holiday. I did, however, in the interest of socializing with good people and cooking good food, make it a point to celebrate Thanksgiving and wouldn’t allow my location (or my very cramped kitchen) to affect the occurrence of that. My challenge: to make Thanksgiving dinner–the turkey, the stuffing, the gravy, the veggies–all of it without an oven (ha!) and using only the 2 burners on my very little hotplate. Impossible? I think not!

I have included here the entire menu I served to our company; we were five in all (oh yes, technically six:-) and I wanted to stay pretty traditional with the recipes. To just state the hardest thing about all this right off, ’twas the stuffing. Couldn’t find any sort of stuffing mix, breadcrumbs, or even croutons (I don’t think they have a Danish word for that) so I had to get 2 loaves of bread, toast them on the stove (yeah, ’cause who needs a toaster?), cut them up into little cubes, and hope for the best when I threw them all together with broth and veggies. Luckily for me, all the effort was worth it as the stuffing turned out splendidly. Anyway, I hope you all enjoy the results of my toiling in the kitchen this last Thanksgiving, I know the meal was memorable and above all things, delicious!

Just on a side note, the veggie recipe I got from Cooking Light but the rest of it, including the stuffing, turkey “medallions” as I like to call them, and the gravy was basically improvised. I got to say that while having an oven would have made this all go a lot quicker (not to mention easier), not having one and being forced to innovation and creativity was an enjoyable experience with equally satisfying results. Don’t have an oven? No fear, anything is possible as long as you have some crockery and access to heat }:-)

Before I go on to the details, I have to say that the star ingredient in all this (because every menu has one), would be fresh Thyme which, thanks to my friend and ‘sous chef’ for the evening, we had plenty of since she spent an hour at least painstakingly pulling Thyme leaves from their stems; yes, SO happy I had help with that! It was an awesome, if not time-consuming task, although it ended up turning her fingers black :p, hopefully that washed off, eventually…

Peppered Sage Turkey Medallions with Red Wine Gravy

Ingredients

(for the turkey)

2 lbs. fresh turkey breast, trimmed

3 Tbs. dried sage

salt & cracked pepper

butter, for frying

(for the gravy)

1/2 cup red wine

3 Tbs. butter

3 cups chicken broth

2 Tbs. fresh Thyme leaves

1 Tbs. dried Sage

1/2 cup milk

2 Tbs. flour

1 cup low-fat cream

salt & cracked pepper

(1) For turkey medallions, take each breast and cut in half; put a piece at a time in a plastic bag and, over a thick cutting board, beat with a can (or meat mallet) until turkey is thin and tender. Repeat with all breast pieces. Season both sides of all turkey pieces generously with salt, cracked pepper, and dried sage. (2) Next, melt 1 Tablespoon of butter over medium-high heat in a frying pan until melted, then add the first turkey piece. Fry for about 5 minutes, browning both sides and checking that the meat is cooked through before transferring to a separate plate and covering with foil. Repeat the frying process for all turkey pieces, adding more butter when necessary to prevent sticking. When done, cover and set cooked turkey aside until ready to serve. (3) For the gravy, use the same pan with turkey drippings and deglaze with a little red wine then add 2 Tablespoons of flour, stirring with a whisk until flour begins to brown slightly. Add the chicken broth, butter, and remaining red wine; let the entire mixture simmer over medium heat until thickened, 8-10 minutes. (4) Stir in the dried sage, fresh thyme, and milk, whisking often for another 5 minutes. Just before serving, stir in the cream and season gravy with salt & pepper. Ladle over the turkey pieces (and anything else in dire need of gravy goodness 🙂

Serves 6

Traditional Sourdough Bread Stuffing with Garlic, Celery, and Onions

Ingredients

2 loaves of sourdough (or wholewheat) bread, sliced

olive oil

1 head of celery, coarsely chopped

4 medium onions, coarsely chopped

5 cloves of garlic, minced

4 Tbs. fresh Thyme leaves

4 cups chicken broth (or 2 bullion cubes with water)

3 Tbs. apple cider vinegar

butter

salt & cracked pepper

(1) Toast all bread by brushing each side of the pieces lightly with olive oil and placing in a frying pan or skillet over medium heat until nicely browned, turning once to toast both sides, about 3-4 minutes total per slice (if you have the luxury of owning a toaster, just use that to toast all the pieces until well-browned). (2) Cut/tear all the toasted bread slices into small cubes or chunks and let sit uncovered for a couple hours until crumbs have hardened slightly. (3) In a large pot, melt 2 Tablespoons of butter over medium-high heat and add all of the celery, garlic, and onions, stirring occasionally and cooking until tender, about 10-15 minutes. (4) When close to serving, add all of the breadcrumbs and fresh Thyme to the pot and stir, before pouring in chicken broth and apple cider vinegar. Mix the stuffing together until well-blended, adding more broth if too dry; season to taste with salt & cracked pepper. Turn the heat to its lowest setting and cover the pot, keeping warm until ready to dish up onto plates.

Serves 6

Buttered Green Beans and Mushrooms with Fresh Thyme

Ingredients

1 lb. green beans, trimmed

1 lb. cremini mushrooms, thinly sliced

3 Tbs. butter

3 Tbs. fresh Thyme leaves

salt & cracked pepper

(1) In a large wok, fill the bottom 2 inches deep with salted water, cover, and bring to a boil over high heat. When bubbling, throw in the green beans and steam until tender, about 2-3 minutes. Immediately rinse green beans in cold water to stop the cooking process, pat dry, and set aside. (2) Next, drain salted water from the wok and melt 2 Tablespoons of butter, lowering the heat to medium. Add sliced mushrooms and Thyme leaves, stirring well and cooking, uncovered, until all the moisture evaporates from the bottom of the wok and the mushrooms are tender, about 10-12 minutes. (3) When ready to serve, throw in the steamed green beans and remaining 1 Tbs. of butter, season with salt and pepper, cover and cook another 3 minutes, until vegetables are warmed through and steaming. Serve immediately beside turkey and stuffing 🙂

Serves 6

So there you have it: Thanksgiving dinner for six, traditionally tasty, pleasantly affordable, and immensely satisfying. The hardest part was actually making it all (in a timely fashion, of course) but if you have as wonderful company/accomplices as I did, then that turns out to be funnest part too :] Must I really wait another YEAR to have Thanksgiving again?!

My question: what is your favorite twist on the traditional gravy recipe?

I used red wine, but I bet there are some amazingly interesting things you can do to spice up this delicious thickened sauce…

11.26.11