Tag Archive: seafood


Ladies Luncheon

farmers-market-nancy-pahlNo but really, how long has it been? Too long. The days stretch into weeks and while Summer zips by I find myself enjoying it often enough away from the kitchen X) It’s no surprise (or excuse for not posting, that’s my fault entirely:( ) but it does leave more time for strolling, shopping, and exploring. Grocery shopping is among the best parts of Summer. I still can’t seem to understand how everyone ends up hating grocery shopping so much. I mean, it’s still shopping…right? And while it may be crowded, bright, and dirty at least there’s fresh food to be found there…better than hunting and foraging for our food I like to think 😀 So, why do I like grocery shopping so much? Well, I don’t have a good reason, just that it is a reason. I don’t mind navigating the tight & narrow aisles for unique and tasty treasures. I rather enjoy the process of finding, comparing, and deciding on things to buy and eventually, devour 😉 Most of the time (and probably to the annoyed dismay of others) I end up taking my time, getting lost, and often standing in the way of the bustling shoppers as I try to decide what “light” coconut milk means in the Asian aisle. Sure it’s depressing because you can’t buy everything in front of you 😉 (and because, oh yeah you have to carry it all home on your back), but that’s not the point. I used to like shopping a whole of a lot less simply because (a) it had become a chore; and (b) it required strict budgeting. But ah, such is life.

I always have a list (“the list”) when I go grocery shopping because it keeps me on track, what I’ve discovered is that it’s important to plan (and yes, budget) some spontaneity into the task of shopping. What do I mean? I allot my spontaneity a certain amount on my weekly grocery list so that while I still get all those things needed for making meals, there’s also room for something random, or daring, or sugar-coated – whatever I may or may not stumble across. Believe me, it has a tendency to be surprising 😉 Sometimes it’s dried fruit or other snacks for my toddler (my first thought “oh thank god, something new. Let’s see if he likes this“), other times it’s a block on cheese that was on sale, or caramelized almonds, or a basket of cherries . Whatever “tickles your fancy” while your out & about on the drudgery of adult life and modern food-gathering is worth your notice and consideration – just be aware that: 1. you do and will always have to shop for food, right? Because 2. you have to eat and eat healthy, and 3. that it’s hugely important and necessary. It is okay to try and enjoy the uncertainty and variety that comes with the modern and the everyday. Sometimes it’s focusing on how little you have to go out and get that makes you overlook the facSnyders_Frans_Fish_Markett that it requires so little to feed and please your family and yourself 🙂 That being said, it’s nice to give voice to my secret delight at the present food-gathering process, hope I don’t upset the haters. I try to appreciate and believe me, that doesn’t always come easy but there are the finer things in life and shopping for food I consider to be one of them.

To pick up at my point, an example would be this luncheon that I prepared for a friend, which necessitated me visiting 3 different stores to properly acquire all the “necessary” ingredients, and even then there were some substitutions. The original recipe was from a “Fresh & Quick” edition of Fine Cooking. Some things just feel special when you go out and get them – fresh seafood (i.e. scallops) included. I remember when I first saw the slippery suckers 😉 I thought: …what even are those? Delicious is what they are. I liked the simplicity of this recipe and was only slightly daunted by the sheer amount of steps in completing the “quick & easy” -ness of it all. Note to self for next time: double the amount of scallops you make because seriously, it won’t be enough…

Before I jump into this recipe, I want to say that the star ingredient would be truly, simply – butter. Where would seared scallops be without Butter-Meltingbutter? I’ll tell you: a little dry and not nearly salty enough. Butter plays a key role in this recipe and is essential for plenty of other amazingly delicious things that only exist because of it (like biscuits, and frosting!) I’ll give credit where credit’s due – butter is the best, and I thank it for existing. I’ve come across a recipe for using a Lemon-Dill beurre blanc sauce to spoon over steamed clams with crusty bread. Mmm…more butter may be needed 😀


Seared Sea Scallops with White-Wine Pea Puree, Peppered Bacon, and Lemony Gremolata

Ingredientsscallops

(for the scallops)

6 – 8 fresh or defrosted jumbo scallops

1 package of bacon, coarsely chopped

2 Tbs. butter

(for the puree)

1 package of frozen peas, defrosted

6 shallots, peeled & coarsely chopped

3 garlic cloves, peeled & chopped

3 Tbs. butterFood52

5 Tbs. white wine

5 Tbs. chicken broth

4 Tbs. milk or cream

(for the gremolata))

1 lemon

1 bunch of fresh parsley, stemmed & chopped

1 shallot, peeled & minced

sea salt & cracked peppergremolata

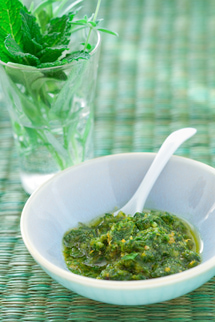
(1) Rinse the scallops under cold water and pat dry, season with salt & pepper and chill until it’s time to cook. (2) To make the puree, melt 3 Tbs. butter in a medium saucepan over medium heat. Add shallots and garlic and let cook until translucent, about 5 minutes. Add the peas, chicken broth, and white wine and let cook uncovered until the mixture is soft & fragrant, about 5 more minutes. Remove from heat and let cool briefly, 5 minutes. (3) Transfer the pea mixture to a blender and blend until smooth, adding the milk or cream and seasoning to taste with salt & pepper. Once pureed, return to the saucepan, cover, and keep warm over very low heat until ready to serve. (4) Heat a a medium skillet or frying pan on medium high-heat. When hot, add bacon pieces and cook, stirring occasionally until bacon is brown and crunchy, 5 – 6 minutes total. Transfer to a plate lined with paper-towels, season with cracked pepper, and cover until ready to serve. (5) Wipe the skillet clean before returning to medium-high heat. Melt 2 Tbs. of butter. When piping hot, add the scallops and do not stir. Let sear 3 minutes per side, turning carefully to brown the bottom & top sides of scallops until they are firm to the touch. Transfer cooked scallops to a plate and cover with foil. (6) In a small bowl, combine the minced shallot and fresh parsley. Zest the lemon and then juice it, adding it to the mixture and stir until combined. Season generously with salt & pepper, adding more lemon juice, if needed. (7) When ready to serve, scoop a spoonful of puree onto each plate, season with peppered bacon, and set seared scallops in the puree. Garnish with spoonfuls of the lemony gremolata. Goes great when paired with either/or garlic bread and champagne 🙂

Serves 2 – wish it made more, double it if you plan on being really hungry

Phew! That was a lot of steps but trust me, it’s worth it. These days as the rain (and wind…and hail…) begins to pop up during the week, I find the salty, fresh air contributing to my recent craving for seafood. My next seafood cooking extravaganza is going to be mussels in Riesling lemon broth with – yes – more garlic bread. I’ll have to make a “luncheon” out of that because what is a good dish without good company? Hope the rest of July provscallop-shellses to be as thrilling as scallops for lunch 😛

My question: What was served with the last plate of scallops you ate?

I ask this because the combinations of pairings with scallops kind of blows my minds sometimes and you never know what will be the perfect side – like a chickpea puree or roasted hazelnuts, or even brown “nori butter” like I read in a Bon Appetit from earlier this year. I will make more scallops this month just to satisfy my new fondness of searing things grill-style in our kitchen’s new skillet. Scallops are a somewhat of a blank canvas and I’d like to make a different version before I get tired of seeing them on the dinner menu 😉

7.13.2014

Spaghetti with ShrimpIt’s finally Spring, at least, I think. With the sudden rush of sunshine and warm weather, I find myself feeling like something fresh and flavorful. Spring is my favorite season by far and I always almost forget how wonderful it is – every year, until it happens again 🙂 This season is proving to be warmer by the day, and perhaps even more delightful is the fact that a lot of fruit and veggies seem to be in season suddenly as well. Ahh Spring, how did I forget you? And how I remember you now that you’re actually here.

I find people underrating seafood these days, so it’s only fitting this post involve the fresh, salty cuisine. Other than being devastatingly delicious, shrimp tend to pack enough flavor that you don’t need a huge amount. I found this recipe in a “quick & easy”-themed Fine Cooking magazine. Quick? Shrimp cooks in like 3 minutes, so check. Easy? Definitely. Other than some chopping at the beginning and a lot of stirring in between, this was easy enough. I did up the veggie content and mix a few things up recipe-wise, but here’s my version. The best part? The cream sauce. The recipe was titled ‘shrimp & pasta with a “light” curry cream sauce’ so I took this to mean light in content, but rich in taste; I accomplished this by quadrupling the amount of curry I added (I’m pretty sure moCreamst people do this too…)

Okay, I’ll admit it. I have a problem. My problem is with cream. Seriously, WHY did we make the stuff? Oh yeah because it’s amazing, because it takes things like sauce, dip, dessert, or a cup of iced coffee and makes it simply spectacular, I’d go so far as to say divine. I love to hate cream because it keeps adding to the comfortable layer already around my waist 😉 but thank god they make low-fat versions of the sinful stuff and sell it in little itty bitty containers, otherwise I might be a little rounder about now. My secret ingredient? That’s right, the cream. No lie. Because what IS sauce without it? I’ll tell you: it’s runny , it’s grim, it’s lacking in texture and depth – but WITH cream? Ahh, then we’ve hit culinary nirvana, again. Remember that a little goes a long way and for this sauce, it’s more than enough.

Pasta + veggies = boring … Pasta + veggies + shrimp? Mmm … pasta + veggies + shrimp … + cream sauce? Now we’re talking 😀

Spiced Shrimp with Soy Beans, Basil, and Mushrooms in a Light Curry Cream Sauce

Ingredients

(for pasta)

1 package spaghetti or linguinicurry-powder

1 package frozen & shelled edamame (soybeans), defrosted

1 package mushrooms (any), stemmed & sliced

1 package frozen mixed veggies (like peppers, or a wok mix with corn, carrots, snap peas, etc.)

4 garlic cloves, sliced

1 package large shrimp, peeled & deveinedChiffonade-Basil

2 Tbs. sesame seeds

1 Tbs. chili flakes

olive oil

coarse sea salt

(for sauce)

1/3 cup chicken broth

1/2 cup dry vermouth (or white wine)

1 cup creamEdamame

4 Tbs. yellow curry powder (sub any other curry powder)

1 lime

cooking oil

sea salt & chili flakes

fresh Basil leaves for serving, chiffonade

(1) Fill a large pot with water. Add a pinch of salt and a spoonful of olive oil. Cover and set over medium-high heat until at a rolling boil. (2) In a large saute pan or skillet, heat 2 Tbs. cooking oil over medium-high heat. When hot (and oil is shimmering), add the garlic and mushrooms, stirring occasionally until browned, about 8 minutes. (3) In a medium bowl, season shrimp with the sesame seeds, sea salt, and chili flakes. (4) Add the frozen veggie mix and endamame to the skillet and cook another 3 minutes. Using a wooden spoon, push the veggie ingredients to the side of the skillet and add shrimp and cook, stirring often until semi-pink but not completely cooked through (3 minutes max). (5) Add broth and vermouth, lowering the heat to maintain a simmer and, stirring occasionally, let the liquid reduce by half. (6) Once the large pot of water is boiling, add pasta and cook according to package instructions until al dente. Drain and return to the pot. Juice the lime over the pasta and stir until moistened. Cover to keep warm and set aside (7) Add the curry powder and cream to the skillet, mixing well, and let the mixture bubble another 2-3 minutes, until sauce is thickened. (8) Pour curry sauce with shrimp and veggies over thShrimpe pasta and stir to combine. Season to taste with sea salt and chili flakes. Serve steamin’ in bowl garnished with a generous pile of fresh Basil leaves.

Serves 4

Well, it looks so time-consuming here when I spell it out step-by-step, but just re-thinking making this recipe gives me this strange desire to cook similar things… involving seafood + cream… hmm like seared scallops with creamy pea puree, or something like that (!)

My question: What is your favorite dish with cream in it?

Seriously, I want to know.

Yes, ice cream counts.

5.6.2014

Rise of the Nachos

chips_paintingI can’t believe it’s 2014 – already! I have no excuse for not having a recent post, other than my Master’s thesis being due very soon. Just imagine all the celebratory food cooking and related cacophony of posts I could do after THAT 😀 For now, I wanted to post this simple & sweet blurb on nachos. Ahh, cheese. Where would food be without you? One of my favorite foods is cheese. One of my other favorites? Salsa. I am also a carnivore by nature and can’t help but like eating meat from time to time too. Where do these three meet? Cue in – nachos. This undervalued dish isn’t necessarily unhealthy, just watch the cheese! Nachos are on the rise and if you’ve a bad or nonplussed experience of the dish before, it’s time to make new memories, I mean nachos. We are lucky to be in the era of limitless culinary diversity and the sheer amount of different things you can put on cheesy nachos is kind of mind-boggling.

From what I remember of my restaurant experience with nachos, it’s a little slimy, a little soggy, and kind of anticlimactic. But I do also remember from my bar-tending days that nachos was the one dish that people would NEVER finish. Why? Because there’s too much if it! Granted, there’s nothing better when you’re really hungry than a steaming pile of chips & cheese, but it’s important to transcend the baseline comfort elements in this recipe to reach something better. The 3 recipes or versions I have here I read in last year’s Cooking Light. So easy! So simple! So tasty! I should write ads for this magazine 😉

When it comes to nachos, here’s 3 tips to remember: 1. It’s quality, not quantity. Gourmet ingredients cheese_nachosgive you some deluxe nachos and no matter what, you will be full by the time you’re done (and there will be some left). Spread a baking sheet onto the oven pan and one layer of chips, no need to make mountains – I know tortilla chips are cheap but please refrain, for the sake of your stomach 2. Don’t skimp on the cheese. Broiled chips aren’t very tasty by themselves, but add the right amount of cheese and viola, irresistible goodness. The best part? Broiling this dish takes 1-2 minutes MAX. You put it in and you’re eating moments later, it’s like magic 🙂 3. Be creative. Try making what you’d consider you’re “dream nachos.” Then m???????????????????????????????????????????????????????????????????????????ake a Greek version, a Caribbean version, and/or good ol’ Tex-Mex. Mix it up and have all-veggie nachos or use some crazy ingredients like toasted sesame seeds or capers.. No need to restrain yourself, this dish is messy and sloppy and will turn out del-ish once covered in warm, melted cheese. Have fun, because you have TIME for that when making dinner only takes 15 minutes!

My star ingredient? Greek yogurt. Greek what?! You don’t need sour cream or creme fraiche, they’re merely nice condiments that should be used in moderation. But, you get some low-fat Greek yogurt and put a big dollop in the center of your nachos? It’s practically the same thing, only better (for your body, I mean). I love sour cream as much as the next American 😉 but hey, there are alternatives to watch the calorie count and Greek yogurt is just as yummy. Below are 3 versions of simple nacho recipes you can make, enjoy and WARNING: you will need napkins 😀

Nachos – 3 Ways

(1) Pork & Bean Nachos with Tomatoes, Onions, and Fresh Herbs

Ingredients

1 bag of tortilla chips, unsalted

1 bag (or 2 cups) of shredded cheddar cheese

1 yellow onion, thinly slicednacho-combos

3 tomatoes, chopped

1 can black or red kidney beans, drained & rinsed

1 pork tenderloin, trimmed

1 bunch fresh cilantro, minced

1 bunch fresh basil (or mint)

1/2 bunch fresh parsley, minced

4-5 pickled or preserved jalapenos, for serving

1/2 cup low fat Greek yogurt, for serving

baking paper

vegetable oil

sea salt & cracked pepper

(1) Season the pork tenderloin generously with salt and pepper. Heat 1 Tbs. oil over medium-high heat in a skillet. When hot, brown the tenderloin on all sides, turning every 4 minutes or so and cook until tenderloin is firm, about 15 minutes total. Remove from heat, cover with foil, and let sit 10 minutes. When cool, slice the cooked pork into chunks and set aside. (2) Spread a piece of baking paper across the bottom of a large oven pan. Preheat your broiler. Spread tortilla chips in an even (or not so even layer) across the baking sheet and top with meat and cheese. (3) When the broiler is preheated, put the oven pan in and broil just until cheese is melted, 1 – 2 minutes. Remove from the oven and add beans, tomatoes, and onion. Top with minced herbs, pickled jalapenos, and a dollop of Greek yogurt. Serve immediately.

Serves 4

(2) Spicy Shrimp Nachos with Salsa, fresh Jalapenos, and Avocado

Ingredients

1 bag of tortilla chips, unsaltedfresh-salsa

1 bag (or 2 cups) of shredded mozzarella cheese

1 bag (around 1/2 kg) frozen small shrimp, peeled & de-veined

1 jalapeno, seeded & sliced

3 Tbs. coconut flakes

4 Tbs. seafood seasoning or market spice

2 ripe avocados, slicednachos_02

1 bunch fresh Cilantro, minced

1 cup salsa of your choice or pico de gallo, for serving

1/2 cup low fat Greek yogurt, for serving

vegetable oil

baking paper

(1) Defrost shrimp, drain, and rinse thoroughly. Place in a bowl with seafood seasoning and 1 Tbs. oil and stir until well-coated. Heat another Tablespoon of oil in a saute pan over medium heat. When oil is shimmering, add the shrimp and cook, 1 -2 minutes, or until shrimp is pink and can be easily cut in half with a fork. Put cooked shrimp in a bowl and set aside. (2) Spread a piece of baking paper across the bottom of a large oven pan. Preheat your broiler. Spread tortilla chips and coconut flakes in a layer across the baking sheet and top with shrimp and cheese. (3) When the broiler is preheated, put the oven pan in and broil just until cheese is melted, 1 – 2 minutes. Remove from the oven and add spoonfuls of salsa, slices of avocado, and jalapenos. Top with minced cilantro and a big dollop of Greek yogurt. Serve immediately.

Serves 4

(3) BBQ Chicken Nachos with Green Onions, Jack Cheese, and Honey-Mustard Coleslaw

Ingredients

1 bag of tortilla chips, unsaltedbbq-chix

1 bag (or 2 cups) of shredded Jack cheese

2 cups of cooked barbecued chicken, shredded or cubed

1 bunch green onions, thinly sliced

1/2 cup low fat Greek yogurt, for servingColeslaw

(for slaw🙂

2 Tbs. honey

1/4 cup Greek yogurt

2 Tbs. mustard

1 tsp. paprika

sea salt & cracked pepper

1/2 head of red cabbage, thinly sliced

1 head of fennel, thinly sliced

2 carrots, peeled & grated

3 Tbs. fresh dill fronds

baking paper

(1) To make slaw, put honey, paprika, 1/4 cup Greek yogurt, and mustard in a jar or container with a tight-fitting lid. Seal the container and shake until ingredients have combined. Season dressing to taste with salt & pepper and chill at least 20 minutes for flavors to meld. Mix thinly sliced cabbage, fennel, and carrots in a large bowl and add dressing. Stir until combined and chill slaw until ready. (2) Spread a piece of baking paper across the bottom of a large oven pan. Preheat your broiler. Spread tortilla chips in a layer across the baking sheet and topnachos_painting with barbecued chicken pieces and Jack cheese. (3) When the broiler is preheated, put the oven pan in and broil just until cheese is melted, 1 – 2 minutes. Remove from oven and add green onions and spoonfuls of coleslaw. Top with a big dollop of Greek yogurt and serve immediately.

Serves 4

My question: what are the craziest (as in crazy delicious) things you can think of to put on nachos?

Come on, I’d love to hear what that could be – I want to make MORE of this cheesy deliciousness and I need some fresh ideas…

1.31.2014

Mussels 4 Ways

musselsAhh, mussels. It’s hard to describe precisely why I like these crusty, salty bivalves. Once in a while I get a little piece of shell as I’m eating, and I think to myself: why do I do this? Simply speaking: mussels are delicious. Labor-intensive, yes. Delicate and high maintenance, a little. Dirty and fishy, often enough. So what’s the big deal? Again, mussels are delicious – and good for you to boot. Plus, making mussels (avec le bouillon) is an art form that I have a lot of respect for – the art of broth-making.

There’s something salivating about a big pot of mussels on the table, filled with dark shells submerged in a broth that smells something of butter and wine. Furthermore, mussels are one of those magical foods that become heavenly when cooked with/in alcohol. The catch? You have to take care when making them, or at least pay some attention. I used to buy the poor creatures alive, keep them padded with damp paper towels in my fridge for 24 hours while I got my act together to go ahead and steam them for dinner. A quarter of the little guys would die as I was trying to de-beard them between the sink and the hot stove. I’ll agree, that’s way to much work… My solution? The seafood section at the grocery store is huge, have you checked it out? There’s all sorts of stuff there, including — mussels, in the shell, beautiful and ready to go. I buy a huge, flash-frozen batch for around $9.00 and keep it in the freezer until I’m ready. The best part? No defrosting, you get to concentrate on the broth and as soon as that’s ready you crank up the heat, add frozen mussels, and five minutes later (less, really) you’re ready to dig in.

strained-mussels-judy-mercer

Mussels seem like a poor man’s food but when you’re eating the poached and pinkened sea creatures between pieces of a baguette and some roasted garlic, it’s close to heaven 😉 My advice is to make mussels in any form — and experiment a little with your favorite seafood spices and sauces. Get the mussels frozen and save them in your freezer for a rainy day. I’ve been playing around with mussel recipes and these particular 4 I made up from looking over the various versions in existence (and my own taste and favorite ingredients). Belonions1ow are what I think are the best ways to serve these sweet & salty little things. As always, when making a big pot of mussels, remember to serve them in bowls with big spoons; and other than the mussels + steaming broth, all you really need is a lot of bread and, oh yeah, napkins.

My star ingredient? The onion family. In every one of these mussel recipes, one of the onion family is used; and thank god it’s a big family. Cooking the onions/garlic is how this dish begins and the finished product would not taste the same without this aromatic group of ingredients. The super hero ingredient? Vegetable bullion allows you to make broth with some hot water in seconds, and it can sit in your spice drawer until needed for months. Just be aware it packs a salty taste. But broth is what makes mussels such a sensational dish, so be sure NOT to water down the both any more than is needed, or maybe just water it down with wine instead 😀

Mussels – 4 Ways (!)

(1) American – Beer Mussels with Bacon, Red Beans, Roasted Garlic, & Fresh Thyme

2 lbs. frozen musselsbeer_mussels

Broth: 1 bottle (light) beer, 5 pieces of bacon, 5 shallots (sliced), 3 Tbs. butter, 3 cups vegetable broth, 1 can kidney beans (drained & rinsed),

Season with: fresh Thyme (minced)

Serve with: whole wheat baguette (sliced), 4 heads of garlic (roasted), & aged Parmesan (shredded)

(1) To roast garlic: preheat the oven to 190 degrees Celsius (375 Fahrenheit). Cut the top off 4 heads of garlic with a serrated knife. Season lightly with oil, salt, & pepper and wrap OLYMPUS DIGITAL CAMERAtightly in foil. Bake for 60-65 minutes until cloves are golden and sweet. Let cool and remove from foil before serving. (2) Melt butter in a large pot over medium-high heat. When hot, add shallots and cook about 3-4 minutes, stirring occasionally. (3) Add bacon sliced and cook until fat had rendered and the pieces have browned slightly, 4-5 minutes more. Remove bacon from pot and chop (or chop in the pot with a pair of scissors). (4) Return bacon to the pot. Add broth, beans, and a Tablespoon of fresh Thyme. Bring the mixture to a boil and then lower the heat; simmer, covered until reduced by 1/3, 10-15 minutes. (5) Return heat to high and add frozen mussels and beer. Cook covered, stirring occasionally until mussels are pink and fragrant, 5 -6 minutes. (6) Season the broth to taste with salt, pepper, and fresh Thyme. Serve immediately in bowls accompanied by bread, roasted garlic, & cheese.

Serves 4

(2) Asian – Spicy Mussels with Saki, Thai Chilies, Mushrooms, & Sesame Seeds

2 lbs. frozen musselsmussels_asian

Broth: 1 cup saki, 1 bunch green onions (sliced), 3 Tbs. butter, 2 cups mushrooms (sliced), 1 small can bamboo shoots (drained & rinsed), 1 small can water chestnuts (drained, rinsed, & sliced), 3 cups vegetable broth, 2 Thai chilies (sliced), 1 piece fresh ginger (peeled & sliced), 1/2 Tbs. soy sauce.

Season with: sesame seeds (toasted) & chili flakes

Serve with: garlic bread or steamed rice

(1) Melt butter in a large pot over medium-high heat. When hot, add green onions and cook about 3-4 minutes, stirring occasionally. (2) Add mushrooms and 1/2 Tbs. sesame seeds, stirring occasionally until slightly browned.  (3) Add ginger, bamboo shoots, chili-flakesand Thai chilies, stirring often until fragrant, another 5-6 minutes. (4) Add the broth, soy sauce, and water chestnuts. Bring the mixture to a boil and then lower the heat; simmer, covered until reduced by 1/3, 10-15 minutes. (5) Return heat to high and add frozen mussels and saki. Cook covered, stirring occasionally until mussels are pink and fragrant, 5 -6 minutes. (6) Season the broth to taste with salt, chili flakes, and sesame seeds. Serve immediately in bowls accompanied by rice and/or bread.

Serves 4

(3) French – Provencal Mussels with White Wine, White Beans, Dill, & Fresh Tomatoes

2 lbs. frozen musselsMUSSELS-PROVENCAL

Broth: 1 cup white wine, 2 red onions (sliced), 3 Tbs. butter, 2 tomatoes (chopped), 1 can white beans (drained & rinsed), 1 celery stalk (sliced), 3 cups vegetable broth, 1 can artichoke hearts (drained, rinsed & chopped), 1 Tbs. dried Dill, 2 garlic cloves (sliced).

Season with: sea salt, cracked pepper, & lemon juice

Serve with: buttered bread & dollops of Greek yogurtwhite_beans

(1) Melt butter in a large pot over medium-high heat. When hot, add red onions, celery, and garlic. Cook about 3-4 minutes until softened, stirring occasionally. (2)  Add tomato, dried dill, and artichoke hearts, stirring often until fragrant, another 5 minutes. (4) Add the broth, and white beans. Bring the mixture to a boil and then lower the heat; simmer, covered until reduced by 1/3, 10-15 minutes. (5) Return heat to high and add frozen mussels and white wine. Cook covered, stirring occasionally until mussels are pink and fragrant, 5 -6 minutes. (6) Season the broth to taste with salt, pepper, and lemon juice. Serve immediately accompanied with buttered bread & dollops of Greek yogurt 🙂

Serves 4

(4) Indian – Curry Mussels with Chickpeas, Red Wine, Leeks, & Cashews

2 lbs. frozen musselsCurry-Mussels

Broth: 1 cup red wine (sub Indian beer), 1 bunch leeks (washed & sliced), 3 Tbs. butter, 2 celery stalks (chopped), 2 carrots (peeled & chopped), 3 Tbs. curry powder (any), 1 can chickpeas (drained & rinsed), 3 cups vegetable broth, 1/2 cup cashews (salted), 1/2 cup milk (or cream), 3 garlic cloves (sliced).

Season with: roasted paprika & fresh cilantro (minced)

Serve with: garlic naan & seared veggies

(1) Melt butter in a large pot over medium-high heat. When hot, add leeks, celery, carrot, OLYMPUS DIGITAL CAMERAand garlic. Cook about 10-12 minutes until softened, stirring occasionally. (2)  Add cashews, curry powder, and chickpeas, stirring often until fragrant, another 5 minutes. (4) Add the broth and bring the mixture to a boil and then lower the heat; simmer, covered until reduced by 1/3, 10-15 minutes. (5) Return heat to high and add frozen mussels and red wine. Cook covered, stirring occasionally until mussels are pink and fragrant, 5 -6 minutes. (6) Season the broth to taste with milk (adding more if needed), salt, roasted paprika, and fresh cilantro. Serve immediately accompanied with buttered naan or seared veggies of your choice.

Serves 4

painting_musselMy “trick,” if you will, is that I only add the wine/saki/beer to the pot of broth when I throw the mussels in, that way the little critters basically poach in alcohol, versus it just burning off in all the boiling… Steaming hot and wreaking of herbs and butter, it’s hard not to get a little messy devouring dishes like these 😛

My question: what is your all-time favorite seafood dish to eat ? – something you wouldn’t make for yourself, but might treat yourself to? Mine would still have to be lobster tail, mmm… 🙂

9.4.13

Pre-Spring Revelry: Crab + Pasta

I know, two seafood posts in a row-I must be living closer to the ocean, right? Yes. Turns out this yummy genre of salty creatures are a pretty easy way to add protein to any meal I end up making. I’ve found all sorts of seafood treats dwell in the pasta_eaterfrozen section too, de-finned, de-veined, de-shelled, ready to cook and eat. And unlike some other meat, anything from shrimp to fish steaks cook through in maybe 3 or 4 minutes. And the (other) good thing about buying frozen seafood? Other than the cheaper part 🙂 Food-borne illness and other nastiness like parasites can’t survive frost. So you can be assured it will not make you sick, which is nice to skip worrying about entirely. The main plus for me, being so proximately close to the source of all this seaness now, is the quality which is much improved…maybe everything is just better in København 😀

I first came across this recipe way back when I still had my Tyler’s Ultimate cookbook. My initial impression after tasting (back when I didn’t like seafood all that much) was so wonderful that I remembered where I’d seen this recipe and looked it back up for this occasion. It’s always nice to make dishes you already know will taste amazing. Using frozen crab meat makes preparation super easy. I bought frozen leg/arms meat, already shelled so all you have to do is defrost and cook in some bubbling sauce (or wine:)) for three minutes or so before tossing with pasta. If you’re averse to using fresh Mint, I encourage you to make an exception with this dish, the herb compliments the crab so wonderfully you barely notice it’s “mintiness.” I managed to see some reviews of this recipe in my quest to find it online and I have to say, there were some serious crab-pasta haters 😦 Honestly, instead of blaming the recipe, blame the cook! Or at least the method of preparation crabs_meatthat made the food so unsuitable to your taste 😛

The star ingredient in this dish? Yes, it would have to be the crab, because it just ups the ante a bit on the recipe as a whole. And crab meat is subtly tasty. I love how red the flesh turns when it’s cooked 🙂 All I can say is, it will not be another 6 months before I have crab again! And these are always such imposing little critters when you see them scuttling across the beach! I try not to think of Sebastian from The Little Mermaid as I visualize the rosy crustaceans simmering in a garlicky broth 🙂 So many possibilities with crab too! Like: crab tacos, maybe? Crab lasagna 🙂 or crab on toast, brilliant!

Fresh Mint & Peppered Pasta with Buttered Artichokes, Parmesan, and Crab

Ingredients

(for pasta)Artichoke_Botanicals

1 package fettuccine or linguine

water

sea salt

(for sauce)

8 oz frozen crab meat, defrosted & de-shelled

1 block of Parmesan (or other aged cheese), grated

1 bunch of fresh mint, minced

1 can artichoke hearts, drained & chopped

1 cup dry white wine

cracked black pepper

5 Tbs. butter

1/4 cup olive oil

(1) Fill a large pot with salted water, cover, and bring to a boil over high heat. While the pasta water readies, heat the olive oil over medium heat in a skillet. (2) Add 1 cup of water and bring to a boil. Reduce heat and let the mixture thicken, about 5 minutes. (3) Add butter, white wine, and crab meat. Bring the heat to medium and simmer, covered until the crab meat is cooked, 3-4 minutes. (4) Lower the heat to low. Add artichoke, fresh mint, and 1/3 of the grated cheese, stirring until just combined. (5) Remove from heat. Season to taste with salt & pepper. crab_posterServe hot garnished with extra grated cheese, fresh mint sprigs , & cracked pepper if desired.

Serves 4

Mmm…briny, savory, herby richness (is there enough adverbs there? ;)) doesn’t seem to get old. What to make next? Watch out salty crustaceans, I’m just beginning…

My question: what is your favorite pasta dish involving seafood?

I’m wondering what the consensus is…

3.25.13

Shrimp Saganaki (!)

Almost called this post “ode to Greek food” but it is perhaps a better ode to cheese 🙂 Maybe there’s something about the dead of winter that makes you crave richly flavorful (and wonderfully filling) dishes. It’s been a while since I had shrimp and I have Greece_posterno excuse; it’s really the cutest, tastiest little crustacean I’ve ever had. The best part of this dish in particular is what I’d like to call its “Greekness,” which translates into how simple it is by nature – with basic ingredients, easy preparation & cooking, and even simpler cleanup since you’re all eating out of the skillet. What more could you ask for from bread and cheese?

My star ingredient would have to be the feta cheese. This dish would have been damn boring without it. And while ouzo, tomatoes, herbs, and shrimp all make for a layered entente flavor-wise, the cheese is always the best part. I mean, isn’t it? There’s something special about melted cheese too, feta is no exception. Like all components of Greek food, feta goes well with garlic. Coincidence? I think not! More like culinary fate, but that does sound a bit intense 😉 The Greeks knew a thing or two about good food back in the day, as they still do, just look at their contributions to cooking and awesome food-eating as we know it today – wine, yogurt, olive oil, vinegar – what would we be eating today without them?

I made this for some fellow foodies last week and it was well worth all the chopping and sautéing (which really wasn’t much). I was initially worried it wouldn’t feed us all, but cheese always satisfies 🙂 if not, garlic bread definitely helps! This dish, like shrimp in general, goes great with a (chilled) white wine. I am not a huge fan of chardonnay but with shrimp it’s like bread and butter 😀

This recipe comes from July’s Bon Appetit. I don’t know why I hesitated to make it way back when in July (oh yes, maybe the newborn baby was a mild deterrent;) but I got rather inspired with a new kitchen and all, along with a whole new host of super markets to forage through for “Greek” ingredients. Call it the spice of life, variety just makesFeta_cheese a chef want to show off 😉 Like the recipe subtext says, high-quality ingredients make this recipe, so don’t skimp on the good stuff – I used a nice ouzo, marinated shrimp, and the most solid chunk of feta I could find 🙂 Everything in this dish comes together pretty fast so remember to put the bread in the oven!

I did add one flaming embellishment to this recipe – which is probably the one reason I like saganaki in the first place! In the  authentic Greek version of this recipe, the cheese is doused in ouzo and set aflame, effectively melting the cheese and looking seriously cool in the process. Did I light my skillet of cheese on fire with ouzo? Yes, without hesitation too 😀 (okay, only a few seconds of hesitation though..) and I can tell you, it was awesomely non-dangerous and was only really alit for about 7 seconds, although completely covered in a purple flames that whole time…This just makes me want to flambe all sorts of others things with ouzo too 😉

Shrimp Saganaki with Fresh Herbs, Feta Cheese, and Tomatoes

Ingredients

1/2 kg. medium-sized shrimp, peeled & deveinedshrimp-medium

4 oz. block feta

3 small loaves garlic bread (frozen or fresh)

1 bunch green onions, chopped

8 garlic cloves, chopped

1 can chopped tomatoes, drained

1/2 cup white wine

3 Tbs. ouzo (anise-flavored liquor)

1/2 cup vegetable broth

1/2 cup chopped fresh dillFIRE

1/2 cup chopped fresh basil

1 Tbs. dried oregano

olive oil

sea salt & cracked pepper

(1) Heat 3 Tbs. olive oil in a large skillet over medium heat. When hot, add green onions and garlic, stirring often until softened, about 3 minutes. (2) Add tomatoes and stir occasionally until reduced by half, about 5 minutes. Remove from heat. (3) Add wine, dried oregano, ouzo, and broth to the skillet and return to heat on medium-high. Let boil until reduced by half, another 5 minutes, and season to taste with salt and pepper. (4) Combine the fresh herbs in a cup, stirring half into the skillet mixture and reserving the remaining half of the herbs for serving. (5) Reduce heat to medium, and add shrimp, laying them on the side, leaving some space in the middle. Put the block of feta in the center of the skillet and cover, cooking until the cheese is soft and shrimp are cooked through, 5-6 minutes. (6) Warm the garlic bread in the oven and slice. When done, place in a glass bowl and cover. (7) When the shrimp & cheese are looking ready, pour a shot of ouzo over the top of the feta. Safely, light the ouzo on fire and let cook until flames extinguish themselves, about 10 seconds. (8) When ready to serve, remove skillet from heat. Put on the table with a wooden cutting board beneath (to protect the table:). Garnish the skillet mixture with the rest of the fresh herbs and cracked pepper. Serve hot with small plates and garlic bread. Goes with white wine, chilled beer, and/or more ouzo with lemon slices 🙂

Serves 4

Shrimp-and-tomatoGod bless Greek flavors! I’ll have to go there someday, especially if I ever want to see the sun again 😉 In the meantime I’m going to cook more creatures of the sea! They’re just so…tasty.. 😀

My question: What, in your opinion, is the tastiest appetizer involving seafood?

Maybe to truly answer this question, I’ll need to throw a little cocktail party where we serve 5 or 6 seafood appetizers and poll the guests to see which dish goes best with very dry martinis 🙂 Mmm…

2.24.13

Fish Tacos Night :)

There comes a time (right around now..) when you’re so anxious for Spring you feel like making equally zesty dishes to remind you it’s the season of sunshine, freshness, and bloom. Maybe I’ve just been cramped up in winter for too long that the sight of all these flowers makes me feel more energetic and adventurous 🙂

Last weekend we had some company over for dinner, both of whom are talented foodies in their own right. My friend cooks authentic Mexican food and she was wonderful enough to bring roasted tomato and pepper salsa — Salsa Roja — which sounds just as awesome as it actually is, as well as fresh homemade tortillas that went wonderfully with the blackened fish.

The actual recipe I used for the fish tacos ended up being a culmination of a few different recipes I found that served my purposes. For the blackened part, I used a recipe from Cooking Light (March 2011) and substituted the spices I had at home for the ones I wasn’t going to go out and buy, namely I used ground coriander, chili powder, and lots of cumin. The idea for the tacos came from allrecipes.com where they paired slaw with fish and chipotle mayo in tacos (but who needs mayo when you have fresh salsa!) For the slaw, I found a recipe made by the brilliant ‘Southwest’ chef Bobby Flay for cumin-lime cabbage coleslaw. I modified it by adding honey because it just sounds like something slaw is missing 😀

The star ingredient in this menu was fresh limes (I know I’m loving/craving citrus these days so I may be a little bias, but still). Limes have this wonderfully sour and acidic flavor that compliments spicy and sweet dishes alike, not to mention it just looks colorful and fresh sitting on a plate. I even served our coca-cola with little lime wedges to stick with the theme :v There is something nice about the flavor combination of blackened fish, spicy salsa, sliced avocado, creme fraiche, and warmed tortillas all cut with a squeeze of lime that makes you appreciate the messy act of devouring tacos all over again!

Spicy Blackened Fish Tacos served with Creme Fraiche, Lime, Fresh Salsa, & Avocado

Ingredients

1/2 kg (or 1 lb) boneless fresh white fish, like Tilapia or Halibut

(for blackened seasoning)

1 1/2 Tbs. ground coriander

1 Tbs. chili powder

1 Tbs. dried oregano

1 tsp. brown sugar

1 Tbs. ground Cumin

1/2 Tbs. ground black pepper

1 tsp. salt

(for the tacos)

3 ripe avocados

3 limes

1 package small flour (or corn) tortillas

2 cups fresh salsa

1 cup creme fraiche

(1) Mix all of the spices together for the blackened seasoning (coriander through salt) in a small bowl. Spread evenly over both sides of the fish until all the seasoning has been used. (2) Heat the oven to 150 degrees Celsius (or 300 Fahrenheit). Wrap the tortillas in foil and put in the oven to warm. (3) In a large frying pan or skillet, heat 1 Tablespoon of olive oil over medium-high heat. When hot, add the fish and cook 3-4 minutes per side, adding more oil if necessary to prevent sticking. Keep the fish centered in the pan so it cooks evenly and just until it begins to fall apart. Remove from the pan and cover with foil. (4) Slice the limes into wedges. Put the salsa, shredded cheese, and creme fraiche into separate bowls and set out for serving. Halve and thinly slice the avocado; squeeze a lime wedge over it to prevent browning. (5) To assemble the tacos, take a warmed tortilla and first put some of the blackened fish, then salsa, cheese, and a spoonful of creme fraiche, top with sliced avocado. Serve plates with a couple of lime wedges on the side 🙂

Serves 4

Honey-Cumin Cabbage Slaw with Red Onion, Carrots, & Bell Peppers

Ingredients

(for the vinaigrette)

3 Tbs. olive oil

1 Tbs. red wine vinegar

3 Tbs. honey

2 Tbs. ground Cumin

(for the slaw)

1 head of red cabbage, stemmed & cut into ribbons

2 carrots, peeled & grated

2 bell peppers (red & yellow) seeded & thinly sliced

2 medium red onions, thinly sliced

(1) Make the vinaigrette first, whisking together the olive oil, honey, vinegar, and cumin in a small bowl until blended. (2) In a large bowl put all of the chopped vegetable ingredients (cabbage through red onions). Add the vinaigrette and mix well. (3) Refrigerate the slaw until ready to serve, at least 30 minutes.

Serves 4

Sadly, taco night is over but that craving for fresh food has not gone away yet so, much like Spring I suppose, my meal plans will hopefully blossom into more colorfully fresh and vibrant dishes 🙂

My question:

What is the best-tasting fresh fish to use for tacos?

3.24.12

Wine, Greens, and Sea Bass

I thought I’d simplify the title in an effort to sum up what I made for dinner tonight. While simplicity may not have been the process of making it, but it was definitely evident in the result. I only started eating seafood last year, so even this endeavor was rather audacious of me. But, since I wish to relish on the tastier aspects of moving closer to the sea, I thought I’d cook a clean, light, white-fleshed fish. And besides, I love these ingredients: fresh mint, white wine, and plenty of butter…it’s like they were meant for fish all along 🙂

This recipe is from Fine Cooking and it originally called for Flounder, which, undeniably, would have been a delicious choice, but Alas among the seafood selection at Whole Foods…Flounder was nowhere to be found. Neither was RockFish, or Red Snapper which both would have served as good substitutes. When I asked the butcher if Halibut would work, he assured me I wouldn’t find it very tasty and one glance at it assured me the same. After purveying my remaining options, I opted for his recommendation, Sea Bass. So, at least the man has taste 😉 Poaching fish is really a nice technique, I wonder why I haven’t come across it more in other recipes. This version involves slicing the fish into strips and then rolling them into little bundles to secure with toothpicks. I’m not going to lie, it was kind of fun positioning things with toothpicks and it sure looked pretty. Steaming the fish in wine and a little bit of water makes it tender and lets it cook completely in under ten minutes.

I served the Poached Sea Bass with White Wine Asparagus Risotto and believe me, I could go on about this process, detail all the steps, seasoning, and stirring it requires but I’ll spare you the reading. What made this dish good is the same thing that mes the sauce good: wine and butter. Simplicity. Adding some Parmesan and Rosemary made this risotto perfectly flavorful for me 🙂 As far as I see it, all risotto recipes are the same and they involve very similar ingredients, and…eventually, they all end up tasting delicious, despite all that stirring and bubbling on the stove.

As for our veggies, I concocted a cold salad from leftover roasted broccoli, peppers, and carrots and added lemon juice and peppered broccoli sprouts. Yes, broccoli sprouts exist. They taste like broccoli, only lighter and fresher. And I’m all about the light and fresh these days, because after all, it’s almost Spring! And with springtime comes new vegetables in season: artichokes, asparagus, beets, and all the peas and tendrils you can think of }:) I bought enough to have a plentiful selection, but I remain a fool for these crunchy, cold sprouts.

Poached Sea Bass with Mint Beurre Blanc Sauce

Ingredients

(for fish)

1/2 lb. fresh Sea Bass

1 Ts. ground ginger

2 Tbs. fresh Mint, chopped

sea salt & cracked pepper

(for sauce)

4 shallots, finely chopped

1/4 cup fresh mint, chopped

1/2 cup white wine

1/4 cup cream (or half & half)

4 Tbs. butter

toothpicks…

(1) Wash the Sea Bass and pat dry. Using a sharp knife, slice into thin strips and lay all pieces flat on a plate. (2) In a small bowl, mix together the ground ginger, fresh mint, sea salt, & cracked pepper. Season both sides of fish with the mixture. Starting from the thicker end, roll the fish up into a tight coil and secure with a toothpick through the thin end and out the other side. (3) Spread the shallots evenly across a medium pan; arrange the fish around the center and add the wine and 1/4 cup water. Bring the mixture to a simmer over medium-high heat. (4) Moderating the temperature all the while, cover the pan and poach the fish on a low simmer until cooked, 5-7 minutes. Remove the fish from the pan and wrap in foil, setting aside until ready to serve. (5) Boil the remaining liquid in the pan over high heat until reduced by half, add the cream and let boil for half a minute. Turn the heat to low and whisk in the butter, 1 tablespoon at a time. Add the remaining mint and stir with a whisk until thickened, about 2 minutes. Season the sauce with salt and pepper and remove the toothpicks from the fish before serving. Serve with greens and toasted bread.

Serves 4

…It tasted like the ocean, apart from wine and butter of course 🙂 I like meat you don’t need a knife to eat; but hey, you didn’t really need a fork either, I barely chewed. Perhaps I was savoring it, or trying to eat slowly in an attempt to make it last. That’s always the thing about seafood…once you cook some, you kind of want to cook more!

My question this week: what is the lightest-tasting fish you’ve ever eaten?

3.22.11

Crispy, Savory, Spicy Shrimp

In thinking of the warmer days (supposedly to come), I am reminded about all the fun I had grilling food outside. Everything that comes from the grill is crunchy, hot, and drippingly delicious, so why not now grill now? It’s only slightly colder…and grayer, but then again there’s nothing like a breath of fresh air 😉

I based this recipe on a version of sautéed shrimp from Cooking Light; they’re ideas involved a delightfully easy and inexpensive shrimp dish that is served with a chilled Turmeric yogurt sauce. And I thought, why not the grill? …it’s less cleanup either way. I’m sure my obsession with sauces is becoming increasingly apparent, but I cannot think of a more wonderful way to serve dinner than hot grilled shrimp with a cold spicy dipping sauce 🙂

I did end up adding more greenery to the sauce itself (because we all need more of that…) and I served the shrimp with warm whole wheat tortillas, Cuban yellow rice, and a batch of curried Okra, another complimentary recipe from Cooking Light. Let me just say that if you feel yourself hesitating to cook Okra, don’t! Okay, so maybe the process is a little time-consuming, perhaps a tad messy, and the cooking a bit sticky (you’ll see what I mean), but if the South vouches for these little vegetables, than they’re worth the taste! But…if I can offer any advice, soak the Okra in room temperature water for 30 minutes beforehand and cut into reasonably small pieces before serving. With a little love, time, and curry these seed pods prove to be tender, nutritious, and curiously tasty 🙂

Herbed Grilled Shrimp with Mint Turmeric Yogurt Sauce

Ingredients

(for shrimp)

1 lb. frozen shrimp (peeled & deveined, tail-on)

2-3 wooden kebabs

1 Ts. olive oil

2 Tbs. Herbes de Provence (or other mix of dried herbs)

sea salt & cracked pepper

cooking spray

(for sauce)

2 cups plain nonfat yogurt

3 Tbs. sour cream

2 Tbs. mustard

2 Tbs. ground Turmeric

2 Tbs. Paprika

1 Tbs. rice vinegar

1 Tbs. honey

1 bunch fresh mint, chopped

1/4 cup fresh spinach, chopped

(1) To make the sauce, combine all the ingredients under sauce and stir with a fork until well mixed. Refrigerate until ready to serve. (2) Preheat the grill over medium-high heat and make sure the shrimp are completely defrosted before washing them thoroughly with cold water. (3) Put shrimp in a large bowl and toss with olive oil and herbes de Provence. Working (carefully), slide each one onto kebab sticks, keeping a little space between each shrimp so they cook evenly. (4) Grill the shrimp, turning once until pink, about 6-7 minutes total. Season the kebabs with sea salt and cracked pepper and serve immediately alongside chilled yogurt sauce.

Serves 4

Much can be said about the powers of the grill and I find myself increasingly longing for some more of this flame-broiled food 🙂 Shrimp is cheap, light, and cooks through and through in minutes, which is easier if you’re serving a starving crowd, like my bf 😉

My question is, in your opinion: what is the best seafood to prepare on the grill?

I’m still undecided myself…

3.8.11

Linguine & Mussels

As I get closer and closer to moving (!) I find myself with very little time to be making meals, especially when we have to keep everything in the kitchen so clean 😉  But since I need to eat (and there are still ingredients in the fridge), I have been trying to make the most out of my time spent in the kitchen. Recently I was given 2 lbs of frozen mussels that had been cooked and vacuum-sealed in a package complete with garlic butter sauce. Yummy, right? If you have any qualms about frozen seafood, I probably should say that the mussels were organic and from a company called Waterfront Bistro. And I wouldn’t be detailing this information if I hadn’t been so impressed by the taste of these mussels, soft, flavorful and did I mention ready to eat?!

I went so far as to buy some cracked pepper linguine at the store (and enriched at that) and later assembled a quick and easy version of the pasta dish Linguine with Mussels. I later replicated this dish with my remaining pound of mussels and slightly different ingredients. And since I’ve had all this practice I thought I’d post my easy version of this dish in case anyone desires some simplicity…

(Quick & Easy) Peppered Linguine with Buttered Garlic Mussels

Ingredients

1 lb. linguine, or pasta substitute

1 package frozen, fully cooked mussels (with sauce)

1 package cherry tomatoes, halved

1 white onion, chopped

3 garlic cloves, minced

1 cup fresh Parsley, minced

1 cup tomato spaghetti sauce

1 cup Parmesan, grated

olive oil

cracked pepper & sea salt

(1) Bring a large pot of salted water to boil over the stove. Cook the pasta according to package instructions. When al dente, drain and return to pot; moisten pasta with 1 Ts. olive oil and season with salt and pepper. Cover and set aside. (2) Meanwhile, heat 1 Tbs. olive oil in a skillet over medium-high heat and add chopped onion and garlic. Let cook until fragrant and soft, about 3-4 minutes. Add the cherry tomatoes and cook for another 4-5 minutes. (3) Microwave the mussels to defrost them (about 6 minutes); when the vegetables are ready, reheat the pasta pot over low heat and add the onion mixture; mix well. (4) Now add the fresh Parsley, tomato sauce, and the mussels and mix well. Before serving, stir in the Parmesan cheese and season to taste with salt & pepper. Garnish with Parmesan and a sprig of Parsley 🙂

Serves 4

I may not have steamed them myself, but I was proud to offer up these tasty Mytilidae in an effort to remind me of the food I’ll be eating, once I get just a little closer to the sea…

My question: What is the best seafood to pair with pasta? I’m just wondering what you guys think 🙂

02.19.11